KS2 art ideas – Amazing projects, activities and lessons
Help pupils to create artwork that has the wow factor with these inspirational projects, art activities and crafts for kids…

- by Teachwire
- Classroom expertise and free resources for teachers
Art – it’s a subject that many of us look back on fondly from our own schooldays. Thinking up KS2 art ideas can be another matter though, especially if you don’t feel particularly ‘arty’ yourself.
The lack of art and design training doesn’t help either, with barely half a day per year given over to arts subjects on primary PGCEs.
However, as primary teachers know, it’s all the singing, painting, story writing and drama that goes on in primary classrooms that makes them such rich learning environments. Read on for advice, activities and KS2 art ideas…
(PS – we’ve also got a page of KS1 art ideas to inspire you).
What do children learn about in art lessons in KS2?
Key Stage 2 art and design is about developing art techniques and an increasing awareness of different kinds of art.
Children should work in sketchbooks and try techniques including drawing, painting and sculpture. They should also learn about great artists from history.
For all primary pupils, the main purpose of the art and design national curriculum is to help pupils create work that helps them to explore their ideas and experiences.
By the end of primary, children should be able to analyse and evaluate art using appropriate language.
Medium term KS2 art ideas
Get pupils’ creative juices flowing with these expert medium-term art plans for KS2. Each resource pack contains a full half-term of planning and there’s currently six different themes to choose from, including:
- Self-portraits
- William Morris and the Victorians
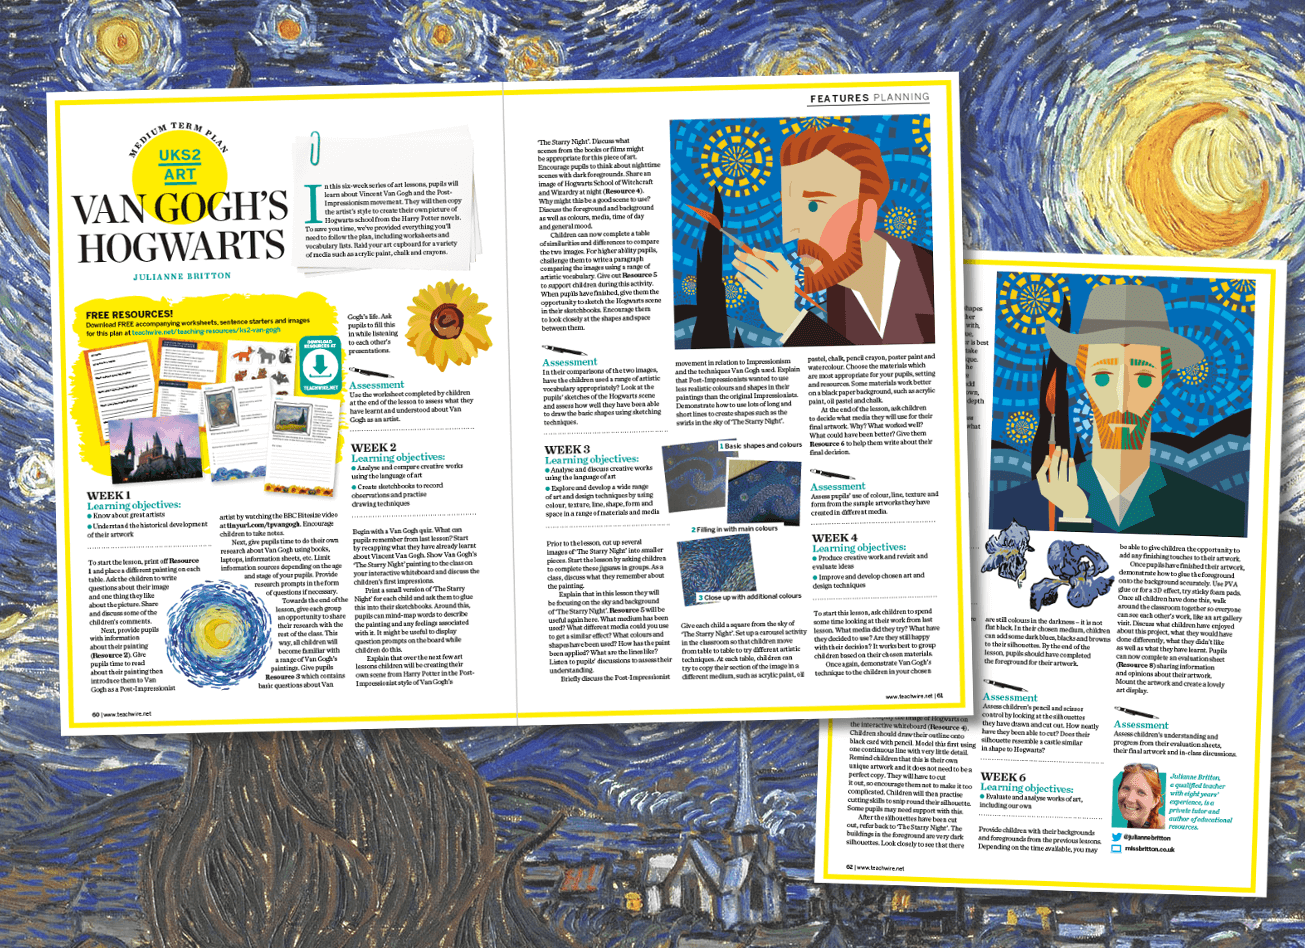
- Van Gogh
- Fashion design
- 3D relief sculpture
- Urban life
Six amazing KS2 art ideas
Use these tried and tested KS2 art ideas by specialist teacher Mandy Barrett in your classroom…
Printable crafts – fabulous fossils
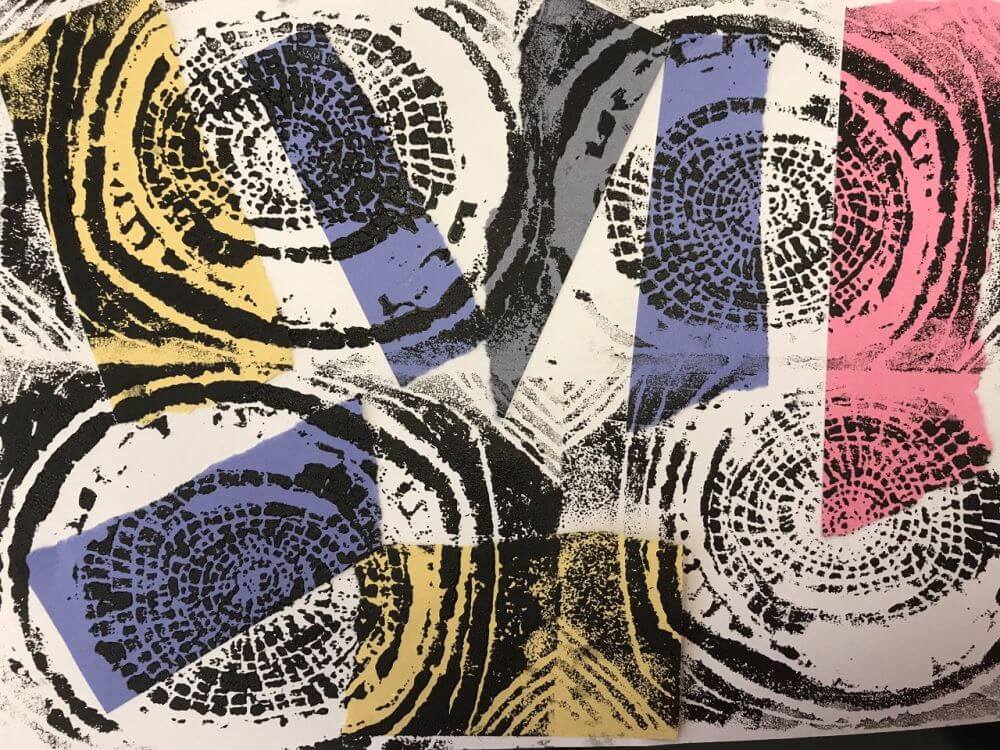
Develop Y3 pupils’ printing skills while learning about rocks and fossils in your science topic. Use biros to carefully score ammonite images into a polystyrene sheet. This creates a block to print from. Encourage pupils to imagine what the print will look like once it’s printed.
Next, experiment with coloured inks to create repeated printed images. Test the prints in sketchbooks first and ask pupils to add annotations about their thoughts, feelings and learning journey.
How can we make the print darker or lighter? How much ink is needed? Which colour do children prefer? If children want to improve their print block at this stage, give them a new piece of polystyrene.
Alternatively, move straight on to experimental work and explore printing onto paper and fabric, discussing any similarities and differences you encounter. Make sure to document all your discoveries and thoughts in sketchbooks.
Finally, create backgrounds by tearing coloured sugar paper and sticking the small pieces onto a larger sheet of paper. Use your blocks to repeat a fossil print over the top.
Inspirational posters simple activity
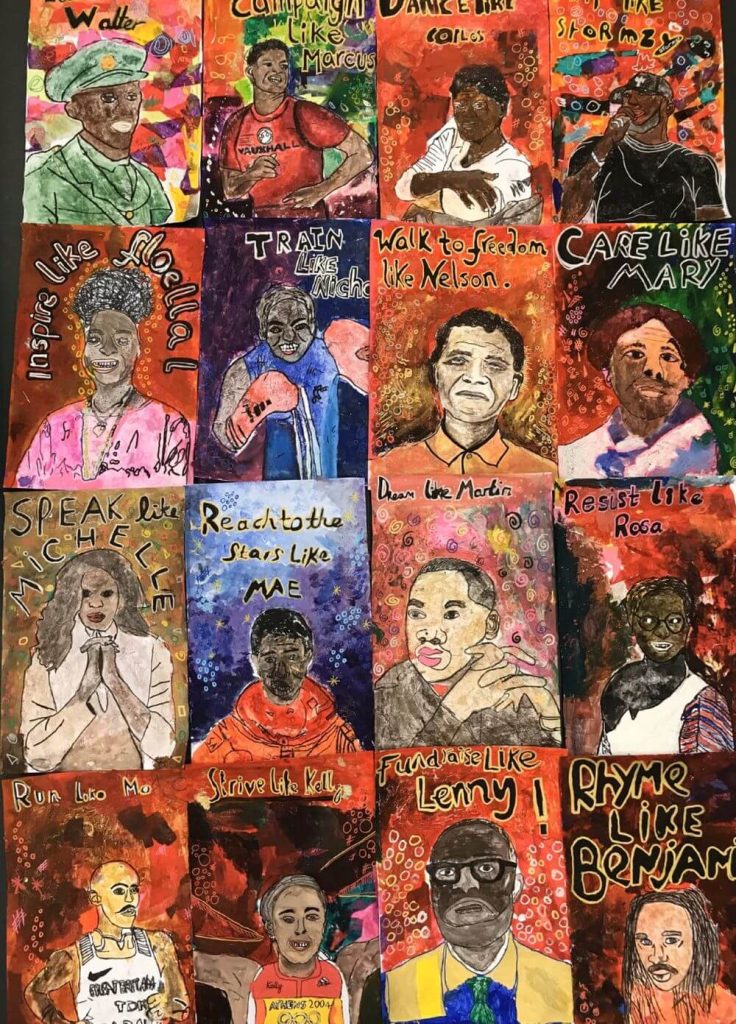
This art idea lets KS2 children work together to produce inspirational portraits of significant people. This fits in nicely with events such as Black History Month.
Before beginning, discuss each person and their achievements and share some famous quotes from them. Next, gather images and transfer them onto a piece of strong A3 cartridge paper by rubbing the back of the photocopy with a layer of graphite or oil pastel.
Fix the picture onto the paper using a small piece of masking tape then trace over the image with a biro. This will transfer the graphite or pastel onto the paper. Enhance the transferred images with black felt pens and add inspirational quotes.
Using PVA glue and a range of materials, add a collaged background. This creates a textured look which makes the paintings more interesting. This is a good opportunity for children to increase their knowledge of preparing canvas backgrounds.
Use acrylic paint to add vibrant colours to the images, making sure that the portraits and quotes don’t get lost. Try watercolour paints to build up colour on the faces, then use marker pens such as POSCA to outline parts of the work.
These pictures make an inspiring display when placed together and will help children to be more aware of a range of inspirational people.
Mythical and fantastical creatures

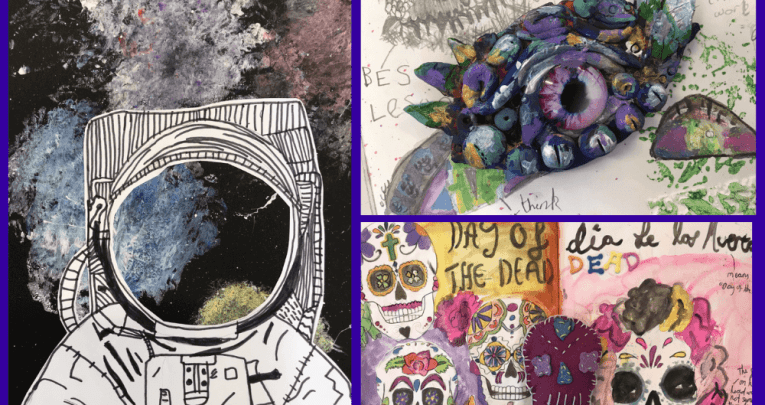
This project ties in well to English units featuring mythical creatures. Begin by drawing a range of eyes in your sketchbooks, exploring different drawing media and textures. For example, children can experiment with using bubble wrap or textured wallpaper to print with.
At the same time, discuss previous art learning such as tonal values and painting and printing techniques, giving children time to record, review and revisit ideas.
Explore the shapes found in different eyes and discuss how these could be created using clay, recording your annotations in sketchbooks to support the learning journey. After this initial exploration, children will be ready to create their clay eye.
They should be confident of the shapes they would like to create and the textures they want to add to replicate scales and other features. Use batons, a rolling pin and clay boards to create a slab of clay that is 1cm thick. Cut this to shape using a clay cutter.
Start your sculpture
Children can now either use a template or score their shape directly into the clay. Use a variety of tools to create texture in the clay to give the appearance of dragon scales. Join different pieces of clay together with slip. This ensures pieces are less likely to fall off while being fired in the kiln.
If you don’t have access to a kiln, leave your dragon eyes to air dry then add a layer of varnish or PVA glue. Alternatively, use salt dough or modelling clay then oven bake, or try playdough or plasticine.
After you’ve fired your dragon eyes, use acrylic paint to add colour. Add a PVA glue glaze over the top to add extra shine if you wish. Finally, add a glass eye using a glue gun. Don’t forget to document the whole process in sketchbooks using annotations and sketches.
Download another lesson plan about creating 3D eye sculptures.
Space art ideas
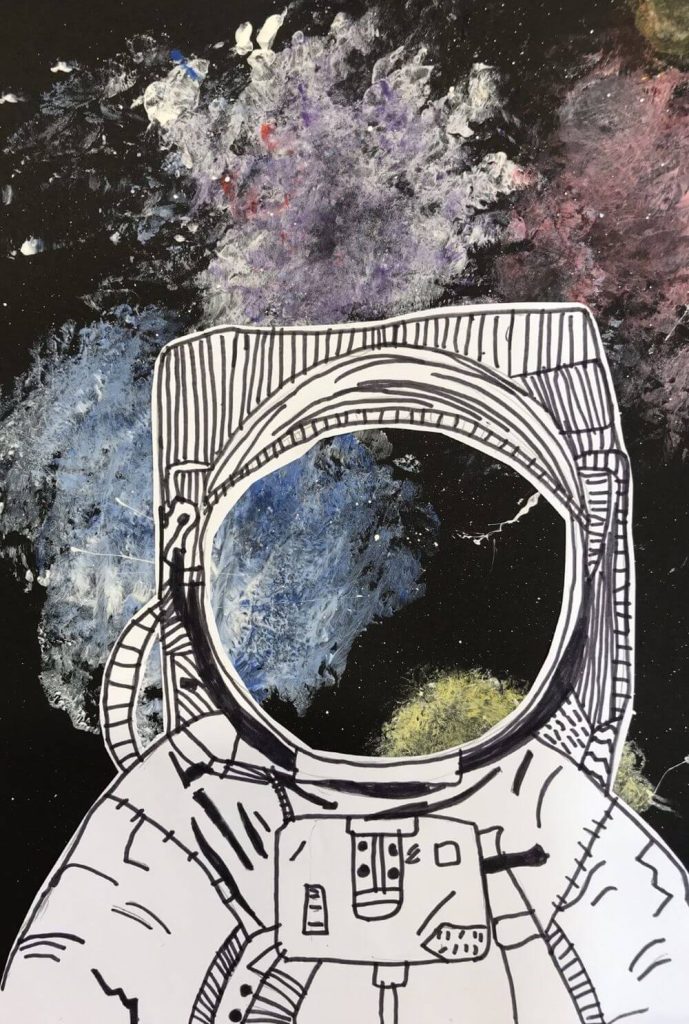
If you’re doing space in science, this project links in perfectly. Begin by looking at a range of images of the universe. Discuss how you might recreate these using pupils’ art skills and knowledge.
Experiment with using a scrunched up paper towel to add bursts of poster paint to black card. This will create a textured, mottled effect. Be careful not to add too much paint, as you still want the black to be visible.
Some children may want a very busy background full of stars and constellations, while others might aim for a more muted effect.
Next, look at a range of drawings and photographs of astronauts wearing spacesuits. Draw different versions of astronauts on white paper using black felt pen. This can either be a close-up, with lots of detail on the suit, or a smaller astronaut to place in the background – children should be encouraged to create a composition of their choice.
Cut out the visor of the spacesuit so that the background is visible through the drawing. This gives the illusion of a reflection in the helmet of the suit. Encourage children to discuss their ideas and reasoning while creating their work.
Super sugar skulls craft for kids
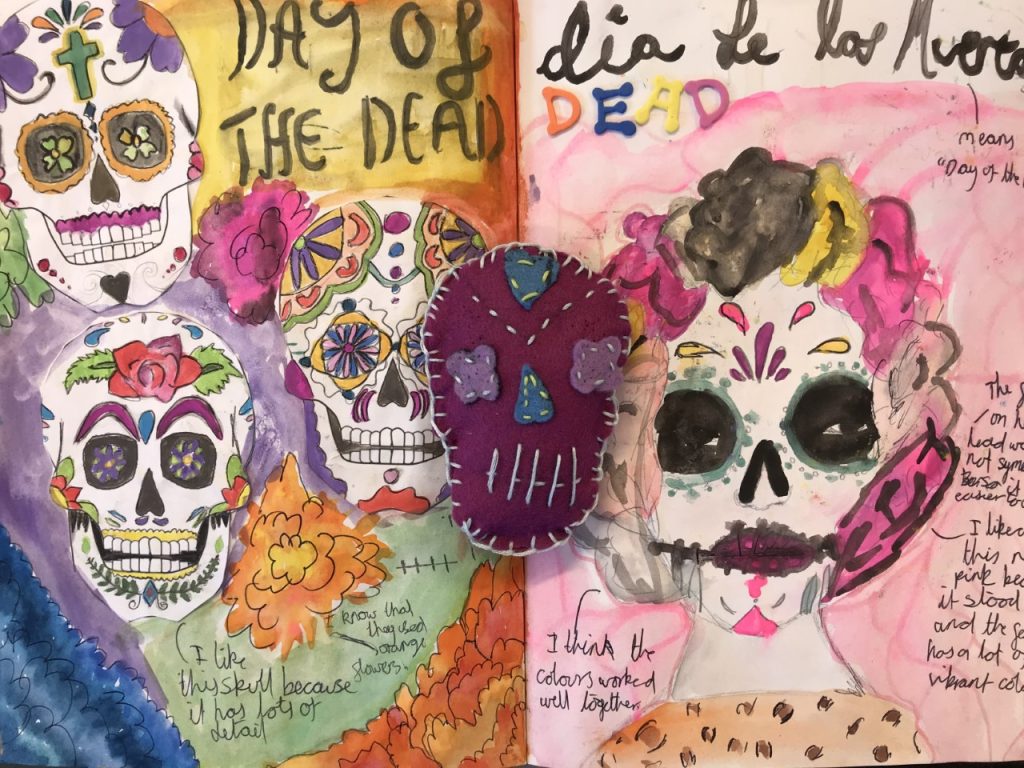
This idea works well if you’re studying the ancient civilisations of South America in history. Encourage children to use their sketchbooks to research the vibrant imagery connected to Mexico’s Day of the Dead holiday.
Explore different art media, artists and the culture of the festival, documenting your findings via annotations in sketchbooks. Next, pupils can practise their sewing skills by creating a ‘sugar skull’ using felt. Use a template to cut out the shape of the skull, then embellish it with felt, embroidery thread and buttons.
This will give pupils the chance to try running, back and blanket stitch. After constructing your sewn sugar skulls, create a report that evaluates the making process. Consider materials and equipment used, the making process, knowledge learnt and skills practised.
Create a self-portrait inspired by mythological beasts
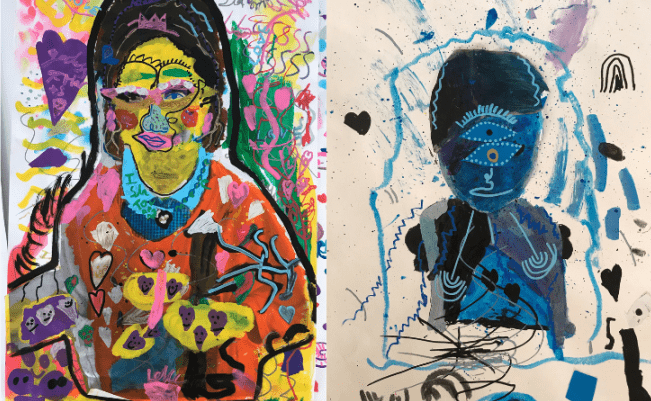
We are always looking for ways to link our creative projects with other subjects, as this is an ideal way to reinforce learning throughout the curriculum.
Our Year 3 children have been learning about Ancient Greece and were also looking at a range of artists and illustrators who have been inspired by artwork from the past.
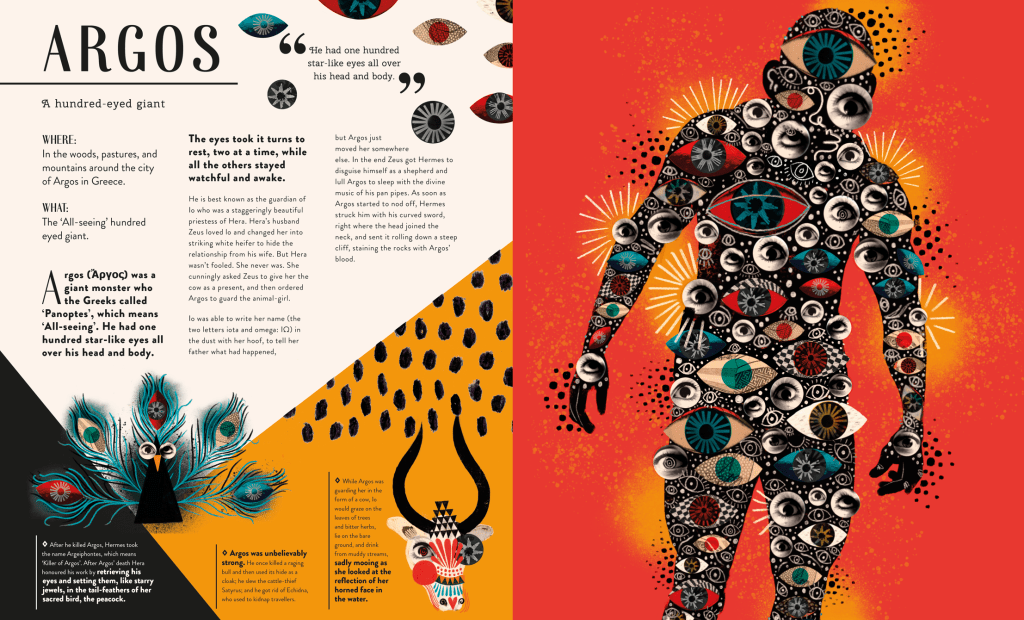
We decided to base a short art project on the book Mythologica, written by Stephen Kershaw and illustrated by Victoria Topping. This title is full of wonderful, vibrant images that really sparked our children’s imaginations.
Where to start
Begin the project by reading a range of Greek mythological stories, and spending some time learning about the different characters. We used a variety of books and websites and watched videos, to find out about the myths, and there’s plenty out there to choose from.
Next, get children to discuss the stories and characters in small groups and brainstorm what they have learned, creating a mood board of their ideas.
Then, focus on the book Mythologica, reading the stories and looking carefully at the illustrations created by Victoria Topping. We also explored her website and studied a range of her illustrations, spending time discussing her style and wondering how she might have created her images. We all liked the bright and vivid colours that she uses in her work.
Creating your creatures
Now let the children spend time planning what type of mythological creature they would like to be. What would they look like? Would they have any special powers or a specific personality? Ask them to work together to take photographs of each other in different poses using an iPad.
How would their creature stand? How can they use the iPad to create different photographs? From which angle should they take the shot? Do they want to include full body or just head and shoulders?
Print the photographs out onto either A3 or A4 paper, in colour or black and white (let the children choose). Then get them to cut out their photographs and fix them onto background paper using glue – you can use sturdy card, or even coloured paper if desired. Again, you can let them choose their background.
Provide them with paint, oils pastels, felt pens and crayons to begin working into the image to emulate Victoria Topping’s style. Children should carefully consider the layout of their work and the colour choice of materials.
Name your characters
Once the children have finished creating the background, leave the work to dry. You can use acrylic paint pens, oil pastels and permanent markers to add the finer details. My class added small icons and images to their creature, and different patterns into the background. These were all inspired by icons and images found within Ancient Greek artwork.
Finally, let the children choose a name for their new character. E.g., God of sunlight and happiness – Goddess of laughter and mischief.
Mandy Barrett is a specialist art teacher at Gomersal Primary in Cleckheaton, West Yorkshire.
Georgia O’Keeffe flowers KS2 art project
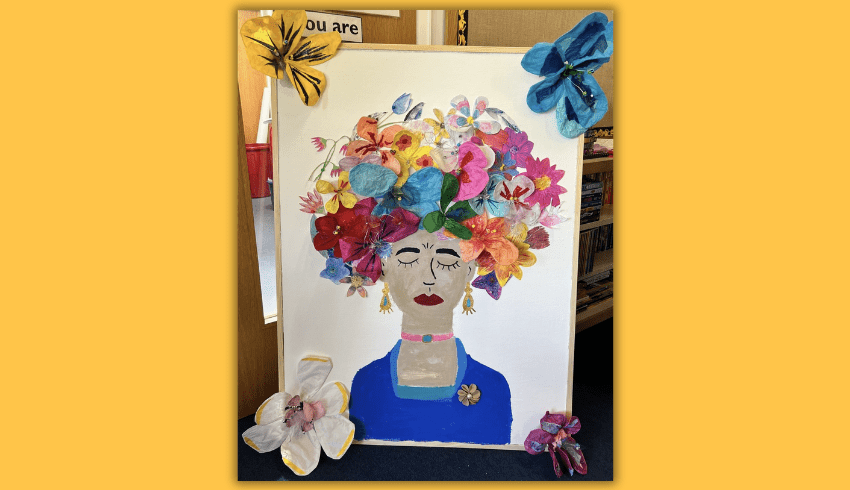
Absorb pupils in the beauty of nature and learn about Frida Kahlo and Georgia O’Keeffe by creating delicate wire flowers, with these ideas from Lesley Armstrong…
This project on Georgia O’Keeffe flowers started with a link to nature. I typically start every term with a new concept for my class. Recently, we looked at ‘relationships’; specifically, our relationships as humans with the natural world.
For the art portion, I wanted to move away from a traditional sculpture unit, which tends to be based on the medium of clay or papier mâché, and try something a bit more adventurous, like wire.
The class had been tasked with designing a collaborative piece for our new meeting room. It needed to be something that could be hung on the wall but still have a 3D element to it.
We had been reading about Frida Kahlo and her love of flora, so had the idea to create wire flowers inspired by her visuals and Georgia O’Keeffe’s flower paintings.
1. Georgia O’Keeffe flowers
Initially, have a look at some of Georgia O’Keeffe’s artwork and discuss the importance of colour.
Can the children identify how colour could portray emotion, movement, or texture? Next, look at the same works in black and white or grayscale and ask the same questions.
In my class, we all agreed that it was important but not vital to have colour in art; monochrome is still creative and beautiful.
However, we did agree that a world without colour could be dull, depressing and less creative. These ideas will support pupils when editing their flower photography images in the next session.
2. Flower photography
Next, a photography session; encourage the children to use different angles and to zoom in to pick up the fine details of flowers. If you have some in your school playground, great, otherwise perhaps you could bring in a bouquet from the supermarket.
They can then manipulate the colour in the images and replicate them in monochrome.
We observed that both images were of the same thing but when looking at them, you concentrated on different parts of the flower; it prompted a different discussion.
One child suggested that colour isn’t always important; it is more about the form and self-expression.
Trending
3. Drawing and sketching
Following this, get pupils to experiment with drawing and sketching different types of live flowers from different perspectives, so that they can understand and explore form and shape.
We chose to keep these as pencil explorations, but you could introduce chalk, pencil crayons or pastels. You could also make watercolour paints available so that the children can experiment with adding splashes of colour if they wish.
4. Wire sculpture
Give pupils an opportunity to create a small-scale composition using flexible florist wire. They can experiment with making one petal and then using tissue paper and glue to cover it. We found it was important to keep the compositions small, as tissue paper and PVA glue don’t play together well!
Some children may decide to take it further by using their collage skills, exploring what happens when they layer different colours together.
This could be done as a separate exploration from forming the wire petals, too, giving them a chance to dry before attaching them to wire.
5. Wire flowers
Once the children have created their wire and paper petals, they can begin their own compositions by twisting wire together to create flowers.
As we were concentrating on making larger flowers, my class worked in pairs. The key here is to use flexible craft wire and aluminum foil tape.
While the tissue petals are drying, pupils can create the centre of the flower, including stamens and fine details.
Some of my class chose to add small beads and pieces of organza, whereas others used coloured paper. Once they’re finished, you can affix the flowers to a display board using pins, ready to show off!
Lesley Armstrong is a Year 6 teacher and Key Stage leader at a primary school in Hampshire. Follow Lesley on Twitter @KujayhawkLesley
Mixed media art projects to try
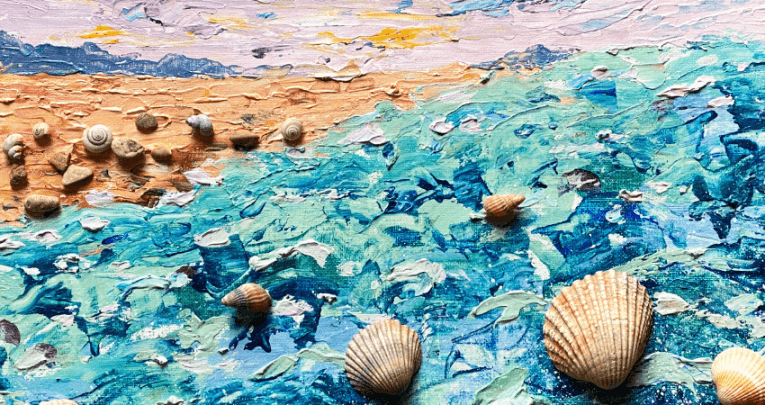
Bringing bold mixed media options to the table can instantly enliven your art sessions, explains art teacher Adele Darlington…
The national curriculum suggests that primary pupils should be taught to use a range of materials and techniques creatively, and learn about great artists. The projects below will help you provide your class with experiences that do just that!
Does the idea of carrying out mixed media art projects with your class fill you with a little fear and trepidation? Is the thought of combining two or more different media, tools and techniques a touch daunting?
Worry not! A mixed media approach to creating artwork is not only for specialist teachers and their classes; it’s for everyone, of every level, and makes for fun and rewarding classroom experiences. Quash your arty qualms with these projects that are easy to easy to plan, prep and deliver.
Relevant artists
Before embarking on a mixed media sequence of learning, inspire your class by looking at some examples of work from relevant artists who create or created in similar styles. This will give the children something to aspire to and will really get their creative juices flowing.
Artworks such as Pablo Picasso’s cubist collages and Faith Ringgold’s story quilts demonstrate how different media can work together for maximum impact.
Another idea is to contact the art department of your local secondary school to see if they will give you access to some of their students’ work. Seeing art ‘in the flesh’ fills pupils with awe and wonder; the brushstrokes, shapes, texture, and colours come to life in a way that cannot be replicated in a book or on screen.
Give pupils the chance to look closely and discuss the artwork. What can they see? How do they think the artist created it? What materials and tools and techniques did they use? Such an experience is sure to give your pupils food for thought and build excitement for their own creations.
Under the sea
For this project you will need cartridge paper or mount board (we were donated offcuts from our local gallery), poster paint, acrylic paint, glue and gold leaf sheets.
For best results, spread the creation of these works of art out over a few days. This gives each layer a chance to dry completely and produces higher quality results.
Before my class began painting, they watched footage of coral reefs on YouTube and explored the ocean landscape using both fiction and non-fiction texts. By the time they began creating, they already had lots of content ideas swimming around in their heads.
Splatter painting
To begin, the children mixed a variety of tints and shades of blue, which they used to entirely cover their canvases. This was then left to dry completely, before using acrylic paint to add seaweed, rocks, coral and fish to their compositions.
Acrylic paint gives a lovely bright finish as well as visible, thick-textured brush strokes. Once this layer is dry it’s time to get really messy! Using a splatter painting technique, pupils can add bubbles and splashes of white to their creations. Water down some white poster paint, dip a brush in and flick the paint onto the canvas.
Finally, the children chose where they wanted to place some accents of gold and then ripped and applied the gold leaf using glue. If you don’t have any gold leaf sheets, foil or other shiny paper will do. The finished pieces look fabulous as the shiny features capture the light and bring the compositions to life.
Woodland landscapes
This project came about after my class had studied and worked with a mixed media artist local to us in Rutland, Jenny Grevatte. She enthused the children with her woodland nocturne artworks and inspired them to replicate them for themselves.
For this project you will need: watercolour paper (to save on cost, I buy this in pad form rather than individual sheets); wax candles; black woodie pencils; green and blue watercolour paints (or watered down acrylic); large brushes; newspaper; PVA glue.
The first step is to use the wax candles to draw vertical tree shapes onto the paper. Then, using either the watercolour paint or watered down acrylic, wash colour across the paper using large brushes. Use blue over the top two thirds of paper and green on the bottom third. This creates the illusion of a blue sky and a lush, green forest floor.
The children love the magic reveal when the wax resists the paint and their trees appear! More trees can then be drawn on the landscapes using the black woodie pencils. These work fine on the wet paper as the lines bleed a little and contribute towards the creation of a mystical atmosphere in the artworks.
Finally, thin strips of newspaper (to look like silver birch trees) can be cut and applied to the pictures with glue. A super simple, but super effective project!
Rousseau’s Jungle
I’ve not worked with a class of children yet, who don’t feel both excited and enthused by the works of Henri Rousseau. Surprised! – also known as Tiger in a Tropical Storm (1891) – is a firm favourite in classrooms up and down the country and provided the inspiration for this next project.
You will need some A3 cartridge paper, pencils, poster paint (plus some acrylic paint if you have access to it) and oil pastels. The jungles of Rousseau are lush, bright and full of interesting flora, and fauna – perfect for inspiring children’s own jungle compositions.
I gave the children I worked with the opportunity to play about with composition ideas in their sketchbooks. They drew a series of thumbnail sketches (small drawings designed to help visualise and plan final works) before deciding on their preferred one to transfer to their larger canvases.
Personalised palettes
The pupils then sketched out their chosen compositions using pencils on the cartridge paper before painting colour on top. Encourage your class to create their own personalised paint colour palettes, mixing up a range of chosen tints, tones and shades to complement their artwork visions. Once painted, the artworks need to be left to dry thoroughly before the next stage can begin.
Finally, using oil pastels, pupils can pick out features of their artwork that they wish to emphasise and make stand out to viewers of their work. This may be an animal or animals, trees, a bird, plants or something else. They may wish to colour the features in using the pastels, or simply outline them. Acrylic paint can also be used for a similar purpose. The final results are bright, striking and full of character.
Adele Darlington is an EYFS teacher and art lead in Rutland. She is also the author of 100 Ideas for Primary Teachers: Art, published by Bloomsbury. You can find her online at @mrs_darl
Speedy art ideas to slot into your day
Little and often is the key to improving kids’ art skills, so slot in these speedy ideas by senior lecturer Maria Vinney where you can…
Everyone knows that art can be a really important way of supporting children’s emotional health and wellbeing. But it isn’t always easy to fit everything into a busy primary timetable. However, there are lots of ways you can build more art into your curriculum that don’t need a lot of time or planning.
Children’s art skills improve the more they practise, so little and often really can make a real difference. Pupils need the chance to revisit and build on what they’ve learnt to really develop.
It’s a big ask, particularly when time is limited but, as well as looking at the curriculum map for your year group and thinking about where you might be able to make meaningful connections between art and some of the other subjects, the following ideas will help you make the most of those five or ten minutes before playtime or assembly, or at the beginning or end of the day.
Treasure box mini masterpieces
No matter which year group I was teaching, I always had a ‘treasure box’ in my classroom. This is a box about the size of a shoebox, covered in interesting paper that invites children to want to look inside.
It contains all sorts of tiny but intriguing natural and man-made objects: a beautiful shell; a tiny carved elephant; an old key – you get the idea. Children choose an object and do a small line drawing on 10cm x 10cm paper, with a choice of either black fine liner or pencil.
Soon enough you’ll find children starting to add their own ‘treasure’ to the box and asking you, “Can I draw something from the treasure box please?”. Before you know it, you’ll have a beautiful exhibition of tiny drawings, some of which may, time permitting, be developed into paintings, collages or even a print.
Five minute drawing ideas
Create a poster called ‘Got five minutes?’, featuring five drawing ideas such as: draw your friend, your shoe, an ear, your pencil case, the view. Change the poster every Monday and challenge the children to complete the five drawings by the end of the week.
I always remind my teacher trainees of the importance of having paper and drawing tools available for wet playtime too – there will always be children who just want to draw.
Match a patch
If you can, purchase five or six small watercolour palette tins for your classroom – they last for ages. Once you’ve shown children how to add water to their brush and stroke it over the colour they want, you’ll find they’ll use them time and time again.
Cut out a patch from a magazine and stick it to a bigger piece of paper, then challenge children to use their colour mixing skills to work outwards from the patch. Children from Y1 upwards love coming back to this when they’ve got a few spare minutes and it doesn’t involve getting lots of materials and equipment out.
If children can hold a pencil there’s no reason why they can’t master a small paintbrush. If you only give them big brushes to work with, those are the only kind of marks they’ll make.
Questions to ask
We want children to have agency over their art and the confidence to make their own creative choices about the materials they use. They can only do that if you create a climate in your classroom where they feel able to try things out and embrace what I call ‘happy accidents’.
Plan in time for ‘trying things out’. Start by modelling and asking aloud some questions related to what you’re doing:
- What happens if I use oil pastels and then paint on top?
- Can I smudge this charcoal and what happens?
- What different kinds of marks can I make if I scratch into the surface?
- Did anything surprise you?
- What do you want to find out more about?
Let children experiment in sketchbooks. They’ll really enjoy the process and it usually generates much excitement and discussion.
Maria Vinney is a senior lecturer in primary and Early Years education, focusing on art and design, at the University of Winchester.
More KS2 art ideas
Make gargoyles out of clay
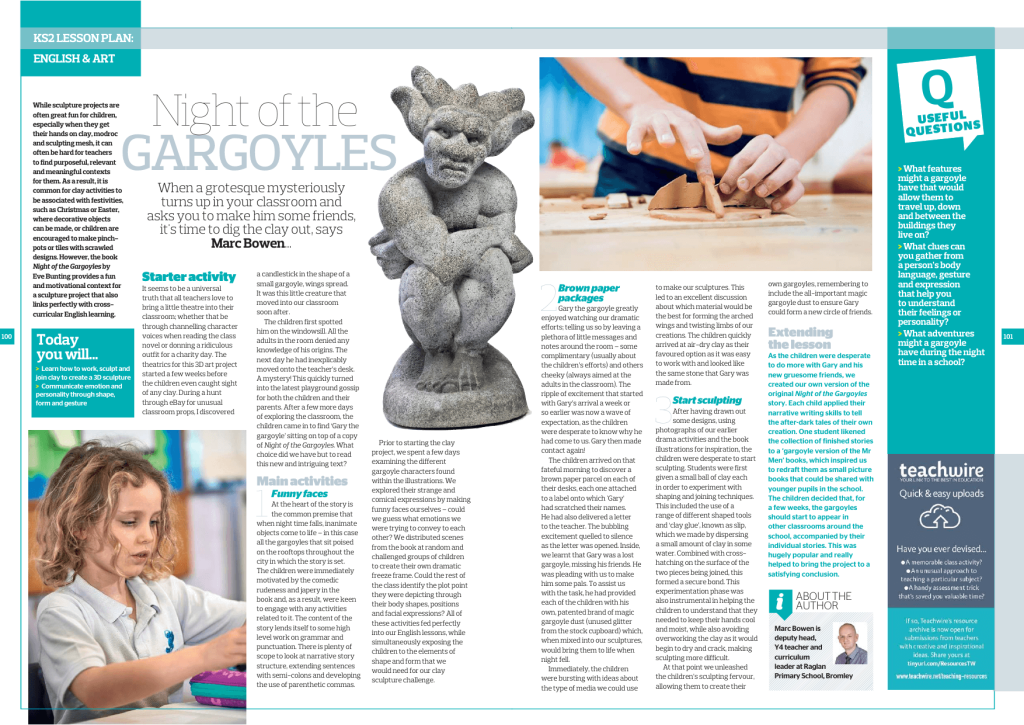
Picturebook Night of the Gargoyles by Eve Bunting provides a fun and motivational context for this clay sculpture project that also links perfectly with cross-curricular English learning. Pupils will learn how to work, sculpt and join clay to create a 3D sculpture.
Experiment with photography

From swallowing a rainbow to playing football with the sun, you don’t need special effects to create astounding photographs, just an active imagination. There’s lots of ideas to try on this photography lesson plan PDF.
Create protest art
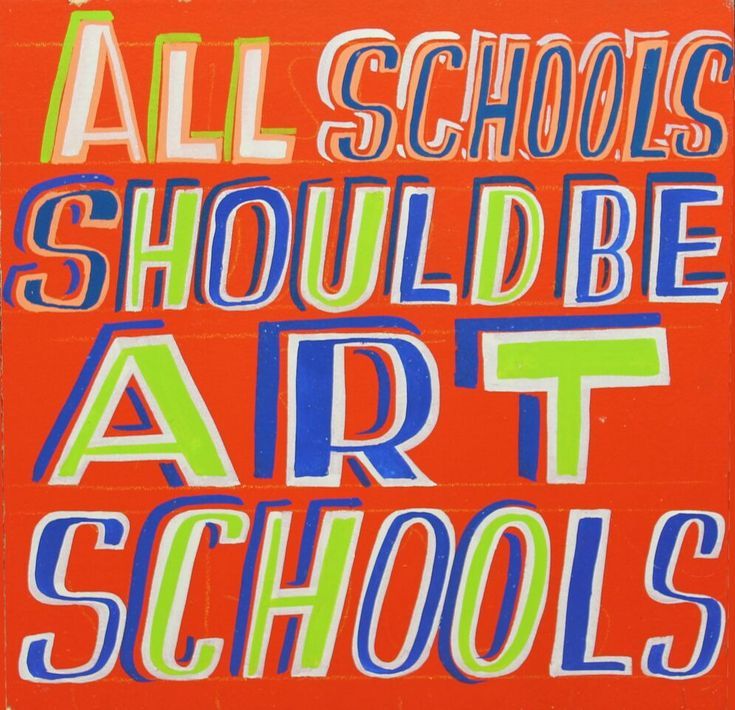
Protests have been at the heart of political and social change for decades. Exploring the work of artist and activist Patrick Brill, known as Bob and Roberta Smith, with this KS2 art lesson plan is the perfect way to introduce your class to activist art.
Motivate footie fans with pop art
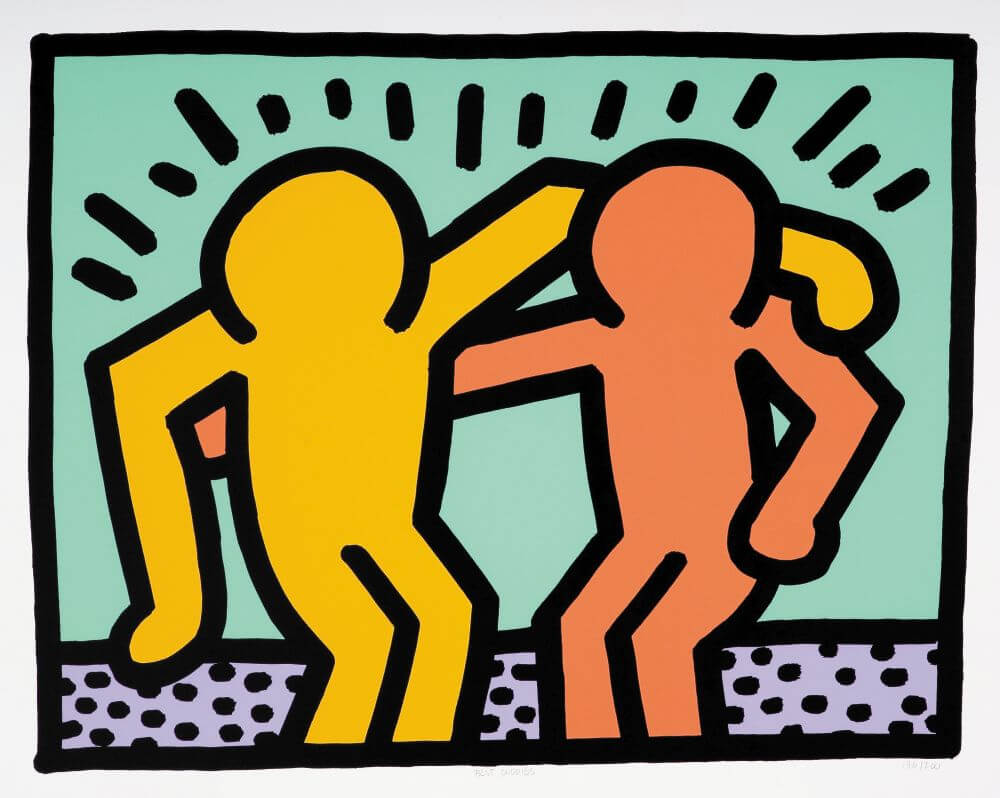
Make links between art and football to motivate sporty pupils by focusing on the art of Keith Haring and creating your own vibrant responses in this KS2 lesson plan.
Make silhouettes and sunsets
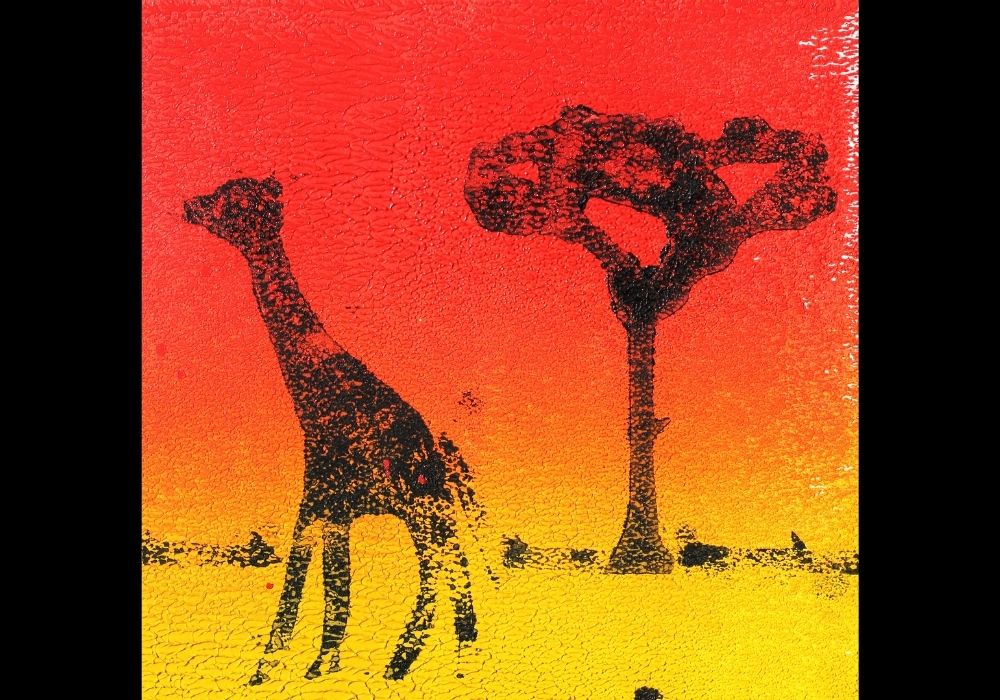
Help KS2 children to understand the principles of printmaking by creating a beautiful savannah sunset artwork based on African wildlife silhouettes.
Make a collaborative collage
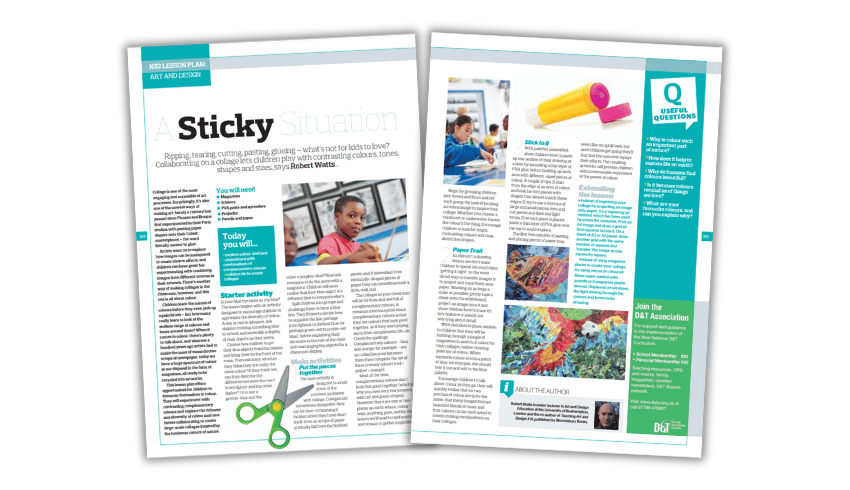
This collage KS2 lesson plan involves collaborating on a collage and playing with contrasting colours, tones, shapes and sizes. Pupils will experiment with contrasting complementary colours and explore the richness and diversity of colour and tone.
Create a clay ghost village
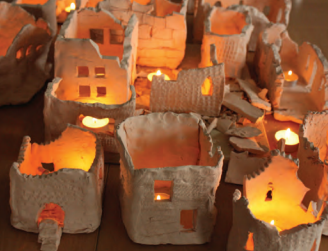
Design and build a collection of ghostly structures out of clay and then combine these individual pieces to create a whole-class sculpture of a deserted village in this atmospheric KS2 clay lesson plan…
Make dream catchers
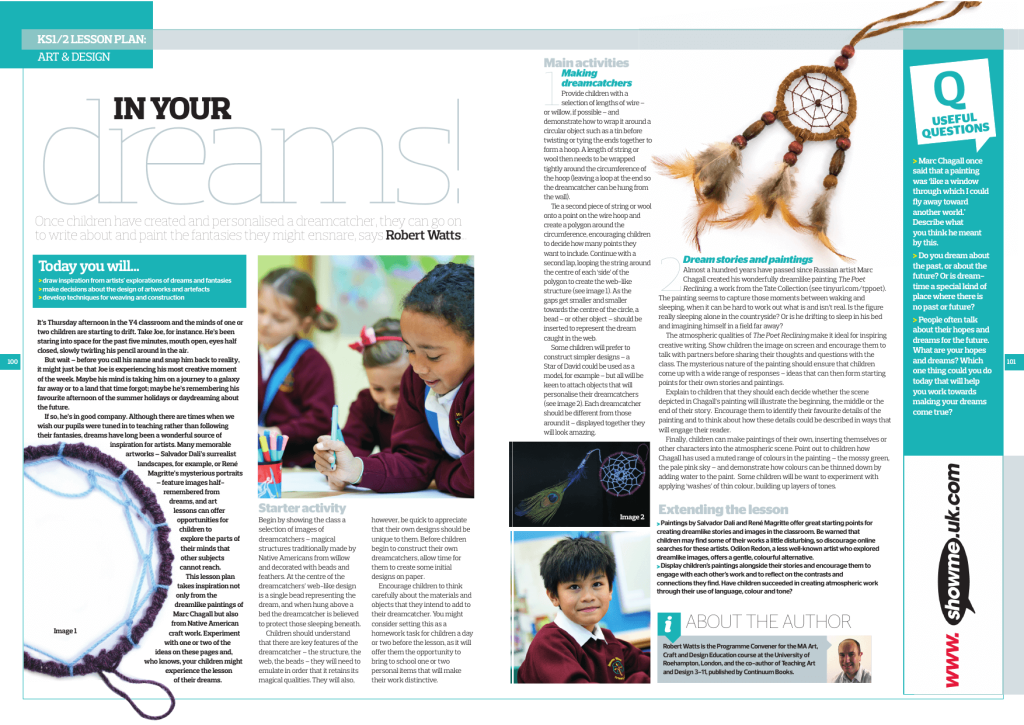
This primary art lesson plan is all about making and personalising dream catchers then writing about and painting the dreams they might ensnare…
- AccessArt is a fantastic charitable organisation that has amazing visual resources and exemplar planning and progression frameworks which will help you teach high quality art and design
- The National Society for the Education of Art and Design features great resources and courses
- Oak Academy has a wide range of KS2 art resources
Browse ideas for Children’s Art Week.


