Teaching handwriting – Best strategies and resources
In this comprehensive guide on teaching handwriting, we explore essential strategies, resources and tips to help you effectively develop your students’ handwriting skills…
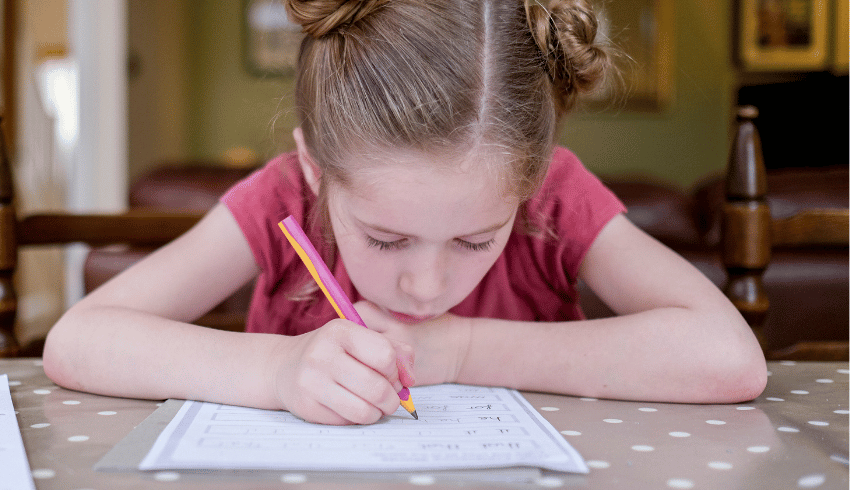
Table of contents
- Why is teaching handwriting important?
- How to teach handwriting
- What order should you teach handwriting letters?
- When should you teach cursive handwriting?
- Getting parents involved with teaching handwriting
- What should your handwriting policy cover?
- Writing implements
- Assessing handwriting
- Practical classroom activities for teaching handwriting
- Handwriting warm-up ideas
- Ideas for developing motor skills
- Tips for left-handers
- Our handwriting experts
Why is teaching handwriting important?
There’s plenty of emphasis on handwriting in the EYFS profile, and throughout the KS1 and KS2 English national curriculum.
The national curriculum guidance states that there should be frequent and discrete direct teaching of handwriting. In KS1 there’s an emphasis on correct letter formation and joins. LKS2 teachers concentrate on fluency and increase in speed. In UKS2 it’s about flexibility of writing styles and the development of automaticity.
In order for children to be working at the expected standard in writing at the end of Key Stage 2, they must “maintain legibility in joined handwriting when writing at speed.”
However, there are differences in opinion over the purpose of teaching handwriting in the digital age. While some would posit that it is not a skill worth pursuing these days, recent research suggests that writing by hand, rather than typing on a device, activates the brain.
It creates ‘much more activity in the sensorimotor parts of the brain’ (van der Meer, 2020). This helps us to both learn and remember more effectively.
“Recent research suggests that writing by hand, rather than typing on a device, activates the brain”
Fluent handwriting will support writing stamina too. Once pupils have achieved fluent handwriting, cognitive capacity is freed up to concentrate on the higher-level writing skills.
Expending all energy on thinking about the shapes that represent sounds leaves little room for coming up with something interesting to say.
Furthermore, research suggests that practising words in fluent handwriting over and over can help us spell, using muscle memory.
With increased automaticity in spelling too, children can focus on composition when transcription is no longer a chore.
How to teach handwriting

The first thing children should learn is correct letter formation. Fine motor activities like colouring, threading and stacking are a good start, but the best practice for learning letter formation is writing letters!
This involves short bursts of fun activity – doing big movements in the sandpit, using chalks on the playground, tracing letters in jelly, cornflour and hair gel.
Handwriting is ‘language by hand’ and if you can turn those movements into habits, you are giving children a flying start.
As learners progress, a little practice every day helps establish good letter formation, letter orientation, sizing and even spacing of letters and words.
Schedule time for daily practice, taking care to observe children’s progress in hand movements as well as their writing.
It’s important to vary handwriting practice too. Switch between copying exercises (which is surprisingly demanding) and dictation, speed writing, or creative writing.
Handwriting might not be the most exciting exercise for children, so try to teach it in short, varied, daily bursts.
“Try to teach it in short, varied, daily bursts”
As you move beyond simple letter formation training, remember to focus on efficiency and automaticity.
A weekly ‘neat write’ exercise is a good experience for more advanced students, but remember that the end goal is ultimately to produce efficient, automatic handwriting, and this is not always super-neat.
Six questions to ask when teaching handwriting
Are pupils developmentally ready?
Handwriting is a complex task and children need to be developmentally ready to sit and write. You can find many fabulous pre-writing activities online to develop the skills and muscles needed to write well.
Sitting at a desk to write before pupils are strong enough can lead to poor posture. It’s far better for early writers to mark-make while lying on their stomach to develop strength in the shoulder girdle muscles, or write on a vertical surface to encourage wrist extension.
Are they sitting right?
If a child’s core, shoulders and hands are strong enough to write, poor handwriting could be due to incorrect writing posture.
Pupils should sit right back in their chair, knees at a 90° and feet planted on the floor. The chair should be tucked in, but children’s torsos shouldn’t touch the table so there is space to bend. Use cushions on chairs or steps under feet to rectify issues with wrong-sized furniture.
Is the paper positioned correctly?
With their forearm resting on their paper to anchor it, children should move the paper up the table with their non-writing hand as they write, allowing their wrist to stay below the writing line.
So often I see children with hands ‘hooked over’ their writing because they haven’t moved the page. Sometimes this is simply because the table is too cluttered.
Tilting the paper makes writing more comfortable and allows children to see what they are writing. Left-handed writers will tilt the paper down and right-handed writers up. Children won’t do this automatically so model it and help them find the correct tilt.
Is their grip good?
Once they are developmentally ready, most children will benefit from being taught the dynamic tripod grip.
However, there are slight adaptations to this which can also work well. Pupils should be able to see the nib of their writing implement and their wrist should be below the writing line.
They shouldn’t be pressing too hard and writing shouldn’t hurt. There are some excellent grips available, but the end goal must be for children to have a good grip without aids.
How is their spatial awareness?
Can the pupil reproduce shapes? Do they have good spatial awareness? Do they use their non-writing hand to stabilise the paper and have a dominant writing hand?
If any of these skills are lacking, handwriting will be difficult.
Are they in the mood?
Handwriting takes time and care to master. Attitude and mood can have a huge impact on it. Have a go at writing in Chinese script – it’s hard and requires real focus and attention to detail. It will remind you how complex handwriting is.
What order should you teach handwriting letters?
While it can be tempting to teach handwriting along with phonics as children learn each grapheme-phoneme correspondence (GPC), teaching children groups of letters based on their formation makes independent writing easier.
If a child has mastered formation of the letter ‘l’, working on the letters ‘i’, ‘u’, ‘t’, ‘j’ and ‘y’ will be easier; each starts with a vertical, downwards stroke. Likewise, forming ‘c’ correctly will greatly support writing ‘a’, ‘d’, ‘g’, and so on.
When should you teach cursive handwriting?
In the UK, each school chooses its own handwriting script, including guidance on letter formation, joining letters, and using capitals.
Choosing a handwriting script can often cause controversy, but the truth is that the choice of script itself is not terribly important since all scripts are a mixture of ovals and vertical movements.
Most UK schools teach a simple script with exit strokes (flicks) after letters like a, d and i. These exit strokes help to promote easy joining of the ‘natural’ joins between letters, where there is no change of direction (like a to c, or d to e).
“The choice of script itself is not terribly important”
Some schools choose to teach a script with entry strokes as well as exit strokes, where each letter starts and finishes on the line.
The important thing is that everyone in the school uses, and models, the same script. Consistency here is key, hence the importance of having a policy that every teachers knows.
Continuous cursive handwriting does not confer greater benefits than other forms of handwriting. It is sometimes thought, that if children write cursively they will learn quicker, write faster, spell better, etc. There is no evidence to support these claims.
Getting parents involved with teaching handwriting

Involving parents in handwriting is simple and extremely valuable. Often, parents are simply too nervous to help their children practise, for fear of teaching them incorrectly.
Parental input is a huge resource in a child’s handwriting journey, so providing resources and support to parents, to make handwriting practice easier at home can be a game-changer.
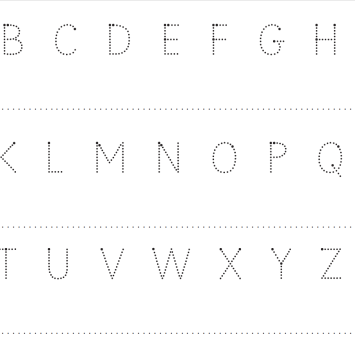
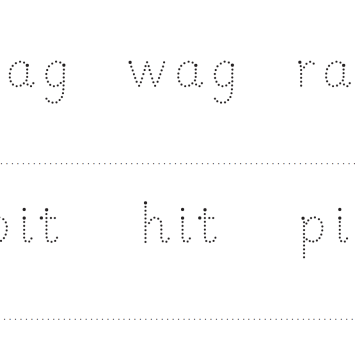
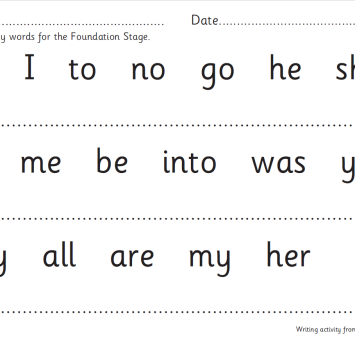
An easy way to do this is to make sure your school’s letter formation sheets are readily available on the school website, and to send out hard copies to parents every year.
Parents typically do a great job of five-minute homework tasks and these little bursts of activity can really help some writers. If children need a bit of a boost, getting parents involved in short bursts of practice can make a real difference.
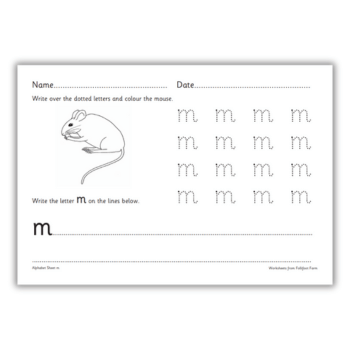
After all, with handwriting, little and often is the key. Practice tasks like sheets for ‘rainbow letters’ (tracing over giant letters in different colours) are easy to share, and allow parents to monitor their children’s handwriting carefully, encouraging good habits.
What should your handwriting policy cover?

A handwriting policy is essential to get everyone in your school working off the same page. When it comes to both teaching methods and questions of assessment, it is really important that your school adopts a unified approach to unlock the range of benefits that handwriting skills have to offer.
Children who handwrite efficiently write better and learn more, so it’s well worth it.
When you teach letter formation, you want children to learn the correct movement to form the letter – not just how to make the letter look right.
“A handwriting policy is essential to get everyone in your school working off the same page”
Right and left-handed writers form some letters differently (crossing the t for instance), so it is important for your school’s handwriting policy to have illustrations of how the letters should be formed by both left and right-handed writers.
You also need to know which joins to teach and when. Most UK adults write a semi-joined script, which is efficient and might even aid spelling.
Some schools aim for a fully joined script (joining letters like o and w), but children tend to drop these difficult joins in years 5 and 6. It is important therefore, for your school policy to clearly set out which joins you should teach and when.
Writing implements
Giving children the right resources can make or break their experience of learning to write by hand. Therefore, it’s important to have a policy on what your pupils write with as well how they write.
Young writers should use everything from wax crayons, paintbrushes and fingers in the mud, to pencils, pens, crayons and felt tips. The more tools that children use, the better their writing habits will become.
It’s also good to have a school-wide policy on which kind of pencils and pens to use, taking into account design features that will help children develop skills as smoothly as possible.
“The more tools that children use, the better their writing habits will become”
Using triangular pencils and crayons promotes a tripod grip that helps children develop good hand control. However, children who struggle with grip might need their pencil to go through a foam ball, a piece of pipe lagging or a pencil grip to help train their hands.
When the time comes to move to pens, it’s best to avoid the cheapest options. Fibre-tipped handwriting pens have the all-important ratio of slip-to-friction that promotes control, meaning that it is worth making their use part of your school-wide handwriting policy.
Assessing handwriting
An important part of your policy should focus on how you assess handwriting. An obvious place to start is that handwriting needs to be legible.
But, more importantly, handwriting needs to be automatic, because if children cannot produce letters without cognitive attention, it stunts their ability to write fluently and efficiently.
You can choose to assess neatness by marking written work, but the much more important areas of handwriting proficiency are efficiency and automaticity.
Practical classroom activities for teaching handwriting
The ‘gold standard’
Work with a child to identify a piece of work they are proud of in terms of handwriting and presentation (not handwriting practice).
Photocopy and stick it into the cover of the child’s book as a pull-out flap. The child can then open this up whenever they start a new piece of work. This is their own ‘gold standard’ below which they would not wish to drop.
Small steps pathway
Supporting pupils to improve letter by letter will have a snowball effect. Identify one or two letters that the child is consistently writing incorrectly. Model the letter formation explaining what you are looking out for.
Then, get the pupil to practise with you, and give them feedback. Challenge the child to start each piece of work with a row of these letters.
Which ones are they proud of? Continue each week with a new letter, recording the previously addressed letters on a bookmark.
Building stamina
Build stamina gradually. Can pupils give you one line of their ‘gold standard’ (possibly joined) handwriting today before they drop back to a more relaxed script?
What about two great lines tomorrow and a short paragraph next week? Could they choose a short section of a written activity to edit and publish in polished form?
This technique is particularly useful when you have children who can’t sustain a joined script when writing at speed.
They can write in a joined hand for a while, then revert to print if they find that easier or quicker until they have developed the skill.
Writing at speed
Consider if you need to introduce an element of writing at speed into handwriting practice.
Set out the expectations for a lesson at the beginning, e.g: “These notes are for you, so make sure you can read them at the end,” versus “This poem is going on display so do your best joined script today and take your time with presentation.”
A two-pronged approach
If children struggle with handwriting so much that it is a genuine barrier to their learning, take a two-pronged approach.
Whilst some activities and lessons are dedicated to developing the skill of communicating in handwritten form, ensure others remove that barrier so pupils can concentrate on the task at hand.
Can the child use the speech-to-text function in Word to dictate their ideas? Can you build the child’s typing skills? The final point looks ahead to skills for life.
Help children overcome handwriting obstacles by focusing on letter formation, pencil grip and more…
Tripod pencil grip
Interestingly, pencil grip isn’t necessarily the key to good handwriting; many people use unconventional grips and are competent writers.
However, it is generally accepted that encouraging the use of a tripod grip is best because it minimizes the risk of strain and offers the greatest control.
A quick web search will give you plenty of ideas on different ways to encourage this technique in young learners, including threading beads onto straws.
An easy one for the classroom is to get the child to hold a rolled-up piece of tissue in little and ring finger; this will encourage them to hold the pencil in a tripod grip.
Letter formation
Once children have a comfortable pencil grip, the next step is letter formation. It’s important children begin forming letters correctly early on, as it can be challenging to change the formation later.
This means when writing a letter, it starts and ends in the correct place. Learning the correct formation will help children to write with speed and accuracy, allowing the writing to flow, particularly when children begin to learn cursive.
“It’s important children begin forming letters correctly early on”
The challenge as teachers is to ensure children are, in fact, forming letters correctly. Often the result is similar, and without seeing them physically write the letter, it can be hard to be sure they have started and finished the letter in the correct place.
Using a handwriting patter is helpful, ie, ‘a’ would be ‘up over the hill, down round to the line, up-down and flick.’
Writing size
Many children come to Reception writing in capital letters; this is usually easier than lowercase letters with ascenders and descenders, while capital letters are the same size.
It can be challenging for children to get the size of lower-case letters consistent while making sure they write on the line. You might end up with a ‘g’ that’s all above the line or an ‘l’ that goes too far up.
In addition, those lowercase and capital letters which are formed in the same way, eg ‘c’ ‘C’ and ‘p’ ‘P’, can further add to the confusion and hinder consistency.
The size of writing is essential for presentation and can help ensure writing is clear for the child to read back.
Use ‘sky, grass, mud’ lines early on. This adds a visual element to writing, allowing children to see where the ascenders and descenders should go easily. This, combined with a handwriting patter, can be very effective.
Spacing
Children must also learn to leave a space between each word to ensure what they have written is readable.
This can be difficult, particularly if pupils haven’t fully grasped what words are and how they form sentences.
An internet search will provide many ideas to support the use of finger spaces such as ‘finger space markers’ or simply using their own finger to make a space.
A fun activity for young children is to write every word is in a different colour so that the difference between the words can be seen easily.
Edtech
It might seem strange to suggest that edtech can support children with handwriting. However, tablet computers and styluses mean there are now more tools available to develop children’s handwriting skills.
Children can also often receive instant feedback and take part in interesting and engaging activities.
Take a look at Kaligo, which supports students in developing their handwriting through fun and engaging games.
Handwriting warm-up ideas
- Chair push-ups: Develop shoulder strength by grabbing the sides of your chair and pushing your bottom in the air, ideally with your feet off the ground.
- Scissor cuts: Hold your arms out in front of you then cross them over up and down. This helps with crossing the midline (the ability to reach across the middle of the body with your arms or legs) and shoulder strength.
- Crab walks: On the floor, push up from sitting with your tummy in the air and walk around on your hands and feet to improve wrist and shoulder strength.
- Spider push: One-by-one, push your fingers together. This helps with finger strength.
- Rubber band stretch: Improve finger strength by wrapping a rubber band around your finger and thumb and stretching them apart ten times. Repeat on the other side.
Ideas for developing motor skills

Children who have had plenty of opportunities to develop motor skills through play and exploration in their early years are more likely to have developed foundations for writing. Try these activities to build these skills:
- Rolling, climbing and skipping will not only support children to develop their arm and shoulder strength, core strength and flexibility, but it will also prepare them for using tools such as pencils more confidently.
- The variety of motion in activities such as threading, stirring, doing up buttons, using spray bottles and making models with clay lays the foundation for the directional movements necessary for letter formation.
- Children require the ability to cross their midline. Take note of whether they can they paint or draw a long horizontal line across a large piece of paper/on the floor from their left to right or vice versa without swapping hands. Can they use one hand to roll a car along a track from their left to their right? If not, you could try playing hand-clapping games, kicking a ball, rotating the upper body, or creating big art with large circular motions. How about getting out the gymnastics ribbons to trace large shapes and letters in the air?
- Some older children will benefit from revisiting gross and fine motor activities to strengthen the muscles and develop the dexterity required for writing. Once ready to put pen to paper, mark making and pre-writing shapes can continue to build fine motor skills and develop hand strength and co-ordination, alongside a rich diet of ‘busy fingers’-style activities.
Tips for left-handers
- Position left-handed children so their elbows don’t bump with right-handed classmates.
- Left-handed pupils often have an inclination to form letters in the wrong direction – repetition of correct formation will help with this.
- Put any text to be read or copied on the right-hand side of their page so their arm doesn’t obstruct it when they are writing.
Our handwriting experts
Thank you to Juliet McCullion, Dr Jane Medwell, Sophie Lamb, Laura Dobson and Dr Angela Webb for their help with this article.
Juliet McCullion is primary English teaching and learning adviser at HfL Education. See more on X at @HfL_Education.
Dr Jane Medwell is a leading academic in the field of handwriting and literacy and Director of Postgraduate Research at the University of Nottingham.
Sophie Lamb is a Y1 teacher and digital lead at Kender Primary School in Lewisham, London.
Laura Dobson runs Inspire Primary English, providing consultancy and training in all areas of English. Follow on X at @inspireprieng.
Dr Angela Webb chairs the National Handwriting Association.


