Smart board – How to choose one & 30+ inspiring ways to use it

Your smart board need not be an expensive dust catcher or over-priced projector – try experimenting with these brilliant ideas…

- by Teachwire

Schools across the land are packed to the rafters with expensive technology that is all too often massively underused. Many classrooms have a smart board, but as a teacher you may receive little training on how to use it. It can easily become nothing much more than a very expensive projector screen.
Happily, it doesn’t take much really to utilise the potential of the IWB and its touchscreen technology, so below are some ideas that will help you to:
- Integrate video and sound, thus increasing student attention and retention
- Encourage student participation and collaboration
- Spark curiosity and creativity
- Summon the world into your classroom and engage your whole class
- Bring concepts to life
- Make teaching easier and more fun
What is a smart board?
A smart board, also known as an interactive whiteboard, is an interactive display technology that combines the functionality of a traditional whiteboard with the power of a computer. It typically consists of a large touch-sensitive display that can be connected to a computer or other devices.
Equipped with interactive software, smart boards connect to computers and other devices, displaying digital content and supporting collaborative learning. These boards enhance classroom engagement through features like:
- simultaneous multi-user interaction
- multimedia support
- compatibility with remote learning setups
Smart boards offer you a dynamic and interactive way to present information, making your lessons more engaging and fostering active participation among your students.
Browse smart board providers
Prowise Touchscreen Ten G2
- Pen-on-paper writing experience
- Four supplied pens
- Rest your palm on the screen while writing
- Hundreds of educational tools
- 2.1 audio soundbar
- Three power modes, including eco mode and night mode
- Five years of software updates and on-site service/repair
myViewBoard Whiteboard
- Gamify lessons with built-in gaming features
- Immersive Reader function
- Splits into six Smallboard workspaces
- Prepare and present on any device
- Built-in teaching materials
ActivPanel 9
- Intuitive remote so you can move around the classroom
- Simultaneous browsers function
- Authenticate with multiple sign-in options
- Seven forms of video inputs and outputs
- Choose from 65″ to 86″
G-Touch® Emerald
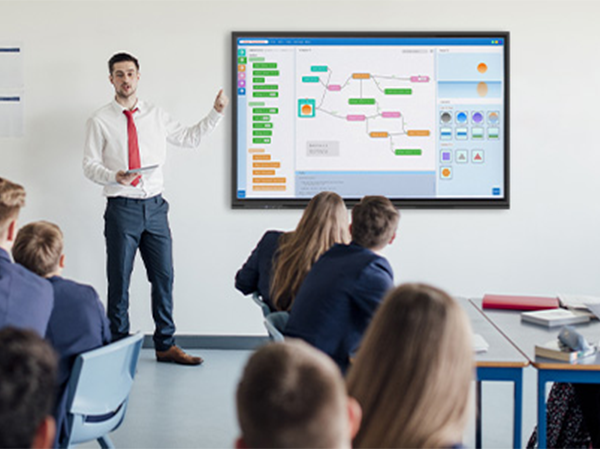
- Wide viewing angles
- Access any function within three touches
- Android built-in
- Pre-installed Genee App Store (over 80% of apps are free)
- Seamless integration with Genee Vision Visualiser
- Front-facing buttons and connection ports
- Dedicated internal technical team
- Training programmes delivered by classroom teachers
10 questions to ask before choosing a smart board
1. What’s the long term value?
The product that seems the best value initially may actually work out more expensive in the long run, so when deciding on a smart board it’s important to factor in display quality.
Look into the the brand’s involvement in product design, and its ability to offer a dedicated product for education. Your chosen AV integrator will be able to work to your specified budget and suggest the most suitable smart board in terms of initial investment and subsequent energy and maintenance costs.
2. Does size matter?
Many of us instantly think bigger is better, but the size of smart board you choose will depend on various considerations. Cost is a key factor, of course, and dimensions are not always relative to price.
Adjustable brightness and glare reduction as standard on many touchscreens allow you to use a smaller screen without loss of clarity for students at the back of the room – although you also need to consider your classroom size, layout and seating arrangements.
3. Will you need extras?
Depending on the size of the classroom and primary usage of the smart board, you may need a soundbar to deliver high-quality sound.
Also, you should consider whether you’ll simply use the screen at the front of the classroom to deliver presentations – or if you require student handheld devices to enable interactive activities, note taking and assessment. Connectivity is a crucial issue, too; decide on the inputs you need today, as well as for future use.
4. Can it be developed?
Does the OS you are looking at give you the ability to add to it and upgrade? Ideally, you need a scalable system that can grow with the ever-changing needs of your classroom.
5. Where is it going?
You need to check the surface that you plan to attach the smart board to prior to installation. You must ensure that the wall is strong enough to hold its weight. Single-skin plasterboard won’t safely support a smart board, so if that’s what you are looking at, you may need a floor-to wall mount or pattressing.
Installation companies should offer a free site survey to assess suitability. Before the installation begins, decide your teaching position to avoid trailing cables. This should ideally be within three metres of the screen.
Another consideration is the direction of sunlight into the room. If it shines directly onto the screen this will affect the brightness of the display and may even interfere with the screen’s interactivity. If you take into account all of these issues before installation, then it should be a smooth and safe process.
6. Who will use it?
As is the case with any procurement process, before investing in a smart board it’s important to determine who the end user will be.
The smart board needs to be accessible and easy to understand and use for both teachers and pupils, including those with special educational needs.
If your installation is for a special needs school, for example, a high-low lift might be appropriate. This allows children who are in wheelchairs or lying on the floor to be able to touch and interact with the screen. A high-low lift is also ideal in many other circumstances where both teachers and pupils will be using the screen.
It’s even possible to have a high-low mobile trolley, which is perfect for open learning spaces or in a small school with limited funds where you need to share the screen between classrooms and various learning groups.
Pupil and teacher safety is also a consideration. The screen needs to have low blue light filters and be flicker-free for comfortable viewing. You should also have the option of lockable screens for teacher use only.
7. Are you covered?
Consider not just the length of any warranty package, but also service levels. Make sure you check carefully for parts exclusions. Many agreements exclude the panel, for example, which can account for as much as 80% of the cost.
Choose a brand that will still be in business years down the line, and can insure future compatibility.
8. What’s the software?
A key consideration is whether you can incorporate the software you are already using into your new hardware, or if you can move to a platform that allows conversion of your existing files.
If you are looking at a new system with a complete change of software, will it be easy to learn for both teaching staff and students? You also need to look at what third-party software is included, and what the licensing requirements – and any restrictions – are.
9. Who will supply and install it?
When choosing an AV reseller/ installer it’s important not simply to look for the cheapest upfront costs. Quality resellers offer a service of support and advice as well as a professional install.
Make sure that they offer the appropriate maintenance and aftercare package. Check how long the warranty will be for repairs, and who will be responsible for the maintenance of the equipment and any issues that arise.
Will the installer also show staff how to use the equipment and go through some simple troubleshooting after it is installed? Ensure that you know who to contact if there is a problem and that any problems will be resolved quickly to avoid any disruption to learning.
10. How will you get the most out of it?
Before deciding on a smart board it’s important to consider what its key function will be. If it’s primarily for showing videos or simple presentations then a smaller display size may be practical, whereas if the core purpose is interactivity and collaboration then a larger screen may be more appropriate.
It’s also worth investigating different brands to see which specialise in offering dedicated education products. Don’t end up accidentally buying an overpriced and oversized television!
Toni Barnett is managing director at StriveAV.
Inspiring ways to use your smart board
1. Chat to experts
Are you studying natural diversity? Arrange a call with a biological research centre. Many experts are very giving with their time, and can be really very inspiring to a class of young people. Work on a don’t-ask-won’t-get basis.
You needn’t be reliant on finding an expert to chat with, either. A class discussion with another cohort from a different country can do much to further cultural understanding, and really requires very little technical expertise.
2. Game-based learning.
Children’s learning thrives on play and competition, so why not harness the power of this in the classroom? There are numerous websites that you can use for doing this, such as NearPod, Kahoot or Socrative. Learners can take part using a desktop or their own device.
3. Role modeling supreme
Showing others in the class examples of good peer work can be very powerful, as can demonstrating what needs to be done to move up a grade boundary.
If you’re feeling very brave, try ‘living writing’. This means you answer a past exam paper and project it onto a screen so that your class can watch you create a model answer.
The process of planning, writing and revision is not something that comes naturally for many learners. For this reason, it can be useful to provide a masterclass in this, using touchscreen technology.
Trending
4. Virtual exploration
You can use your smart board to take a virtual school trip using Google Arts & Culture or Google Earth. This lets you walk around sites of educational interest and can be useful in exploring the kind of places that no school budget will stretch to for a field trip.
Although, if you’ve been lucky enough to get out of your classroom on a trip, use the Photo Sphere app to capture a 360-degree image of the site you visited, then revisit it when students are writing up field notes to spark memories of their experience and get the words flowing onto the page.
Visit museums without even leaving the classroom, thanks to virtual tours such as those of the National Gallery or the Louvre.
5. Report back
Ask students to create media content that you can share on the smart board. Try using an app like TouchCast to create a news report about their learning. Only have one iPad in class? Not a problem. Make a class report on their topic this term or on the unit they have just studied.
The app allows learners to utilise other media content, too, such as YouTube, Maps and even a news ticker to create a polished result. Working on a class project can be very rewarding and helps to recap the learning that has been done recently.
One of the real joys of being a teacher is finding an approach that will capture the imagination and interest of your students. Your smart board need not be an expensive dust catcher or over-priced projector – try experimenting with a few of these ideas to engage your classes and help them achieve their potential.
Rachel Jones is e-learning coordinator at King Edward VI School, Southampton. Her book, Teacher Geek, is published by Crown House.
Smart board software recommendations
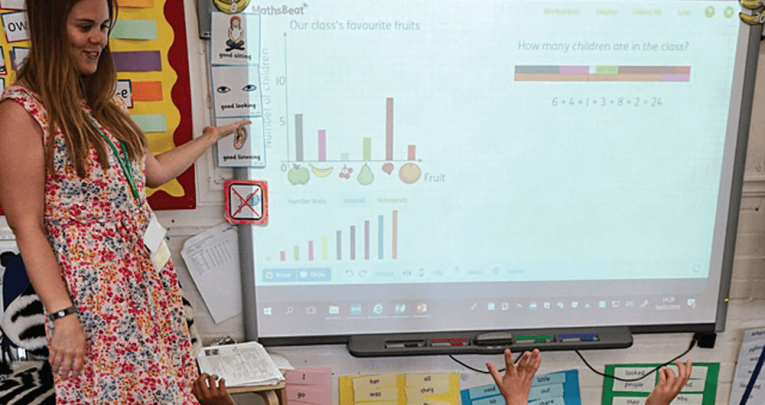
- MathsBeat, a mastery teaching approach, comes with IWB software to help you save time
- White Rose Maths’ KS3/4 content contains IWB content such as a regular ‘problem of the day’ and daily challenges
- Display one of imoves’ 1,000 cross-curricular lessons and activities on your smart board to get kids moving
- Students can use your smart board to talk through problems with a subject expert at askOLA, a learning and wellbeing support system
- Play interactive phonics games on your interactive whiteboard with CGP+
More innovative ideas for your smart board

Use a document camera
A document camera or digital microscope can be transformational in the way that it brings learning closer to students, especially for demonstrations and experiments. Check out the award-winning Hue HD Pro.
Project exemplary student work and keep learners aware that what they produce is likely to be published for their peers – we tend to work a bit harder when we know our output will be shared.
Create presentations with impact
Move beyond Powerpoint and head over to Prezi. It’s a powerful and creative tool to energise presentations with real impact. Another great site is Powtoon, where you can create amazing animated presentations.
Stream videos
Documentaries, news clips and interviews offer rich learning opportunities – streaming video can help make connections between class work and ‘real life’ easier for students. Try TED talks, where you can search by topic.
Annotate web pages
Get creative by reviewing, notating, and sharing any web page with Bounce. Pasting a web page address into the bar turns it into an interactive screenshot where students can jot their own ideas.
Quizzes and tests
Project practice quizzes and tests, which are a great way to check understanding, as well as guide students in effectively preparing for an exam. Try Quizizz for size.
Play music
Use music clips to inspire critical thinking about language, grammar, and word use; make cultural and/or thematic connections with music; or teach a foreign language. Look at Pentatonix’s ‘evolution of music’ video to inspire students with a musical medley over the decades.
Watch quick tutorials
Students – individually, in small groups or as a whole class – can access quick tutorials for a problem they are getting stuck on. Try global classroom Khan Academy.
- Topmarks is a really useful website that includes an index of dozens of websites, online activities and web-based resources that play nicely with many IWBs.
- Pic-Lits is a free creative writing site that matches images and photographs with carefully selected keywords in order to inspire thinking and help students write, express themselves and share their work with others.
- Slideshare is brimming over with presentations, infographics, documents and inspiring videos created around the world.
How to break free from the front of your classroom
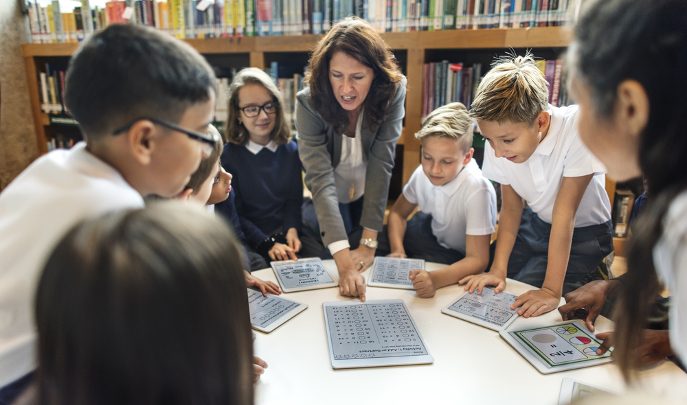
Don’t chain yourself to your smart board, no matter how great it is. Ranjit Singh from Genee explains how a multi-device classroom can transform your teaching and learning…
Classroom technology has certainly evolved over the years. Let’s take the whiteboard, for example. It was first introduced in 1960. By the 1990s, Smart Technologies had already produced something more innovative and interactive that used projection technology.
The success of this evolution meant that by 2008, the majority of primary and secondary schools had a smart board in their classrooms.
These developments have had a significant impact on the content we can present in lessons. But while teachers are able to display videos, images and digital content as well as surf the internet and annotate screens, has the way we teach really been transformed by this technology?
Generally speaking, teaching involves a classroom of students facing forwards, while you stand at the front, delivering the lesson. And while this is fine in theory, can you always deliver an engaging lesson and provide enough support to every individual from the front of the class?
“Has the way we teach really been transformed by this technology?”
Surely with all the technology currently available, we should be more flexible and creative when it comes to presenting lessons to our pupils?
Revolutionising learning
The development of the smart board brought many benefits to the classroom. And it still continues to provide an engaging way to learn. But like anything, using this technology in isolation can be limiting. Used in conjunction with software and other audio-visual (AV) systems such as interactive multi-touch screens and tablets, however, you can create a more immersive and collaborative learning environment.
So, rather than allowing technology to dictate the structure of the lesson, you can revolutionise the way you use this equipment. For example, instead of simply projecting content on the board for whole-class working, you can control the information from a smart device and mirror it onto individual students’ tablets.
Hosting it this way creates a more flexible environment. It allows you to move around and interact more freely with each individual.
Putting it into practice
There is a huge amount of technology on offer to schools, so it’s important that you choose wisely and ensure that it will positively impact teaching and learning.
There’s no point opting for the latest gadgets if they don’t fit with your school’s existing infrastructure, though. Therefore, you should look to implement technology that complements existing resources, allowing you to take your teaching to the next level.
How does a multi-device environment work in practice?
Using a number of devices, including mobiles and tablets, you can transfer activities and information from one device to another. For example, in a science lesson, you can display an image of the solar system onto your smart board. From this, you can annotate various planets and set tasks relating to the highlighted areas.
The clever bit though, is that it provides the opportunity for differentiated, yet discreet learning. The ability to transfer information means you can distribute different tasks to different students, allowing them to work at their own levels without announcing it to the rest of the class.
Minimising and managing distraction
Allowing students the independence and ownership to use their devices as part of the lesson is bound to emulate concerns around procrastination and distraction from the tasks at hand.
However, there are tools available to alleviate these worries. You can monitor, control and limit what students are able to access, meaning that they don’t stray away from class activities.
Ultimately, the classroom should provide flexibility and creativity to both the students and you, the teacher, allowing you to break free from the traditional structure, and make learning more personalised and engaging.
Browse more edtech solutions at this year’s Bett Show, or take a look at our posts about management information systems and AI in education.


